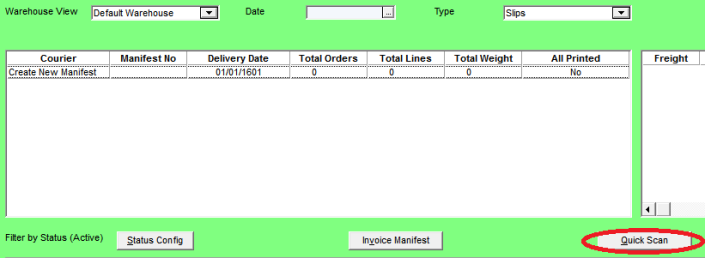
Use this option when you have already picked your orders and printed the invoices via the Invoice Creation program, but you want to add the invoices to a delivery manifest for checking and/or printing. The printed invoices must include a barcode that you can scan. Likewise, you must have a printed manifest barcode.
To use the delivery manifest Quick Scan option:
Refer to "Wide Warehouse Scheduler - Manifest (v2.8)".
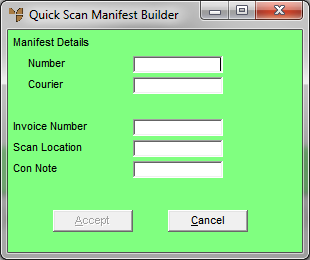
Micronet displays the Quick Scan Manifest Builder screen.
|
|
Field |
Value |
|
|
Manifest Details - Number, Courier |
Scan the manifest barcode. This barcode number must be in the format ManifestNo+CourierCode. The manifest number and courier default in these two fields. |
|
|
Invoice Number |
Scan the invoice barcode. The Accept button is ungreyed when you scan a valid invoice number. |
|
|
Scan Location |
Optionally, scan the location barcode. |
|
|
Con Note |
Optionally, enter a consignment note number. |
Micronet updates the scanned invoice (within Micronet) with the manifest details (manifest number, courier and expected date), and the scan location and consignment note number if entered.